Share
18 July 2021
How To Build a Small Garden Wall
Updated: 18th February 2025
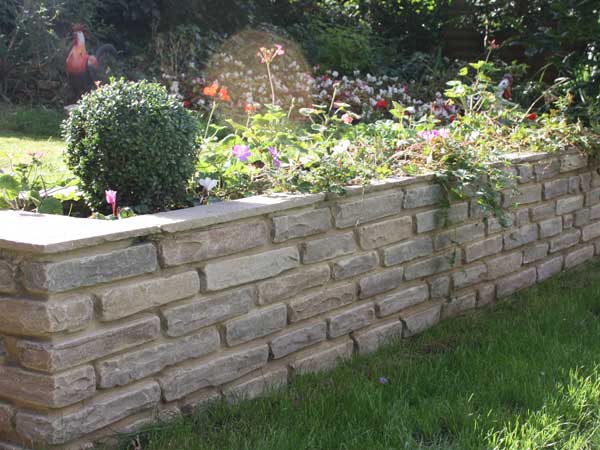
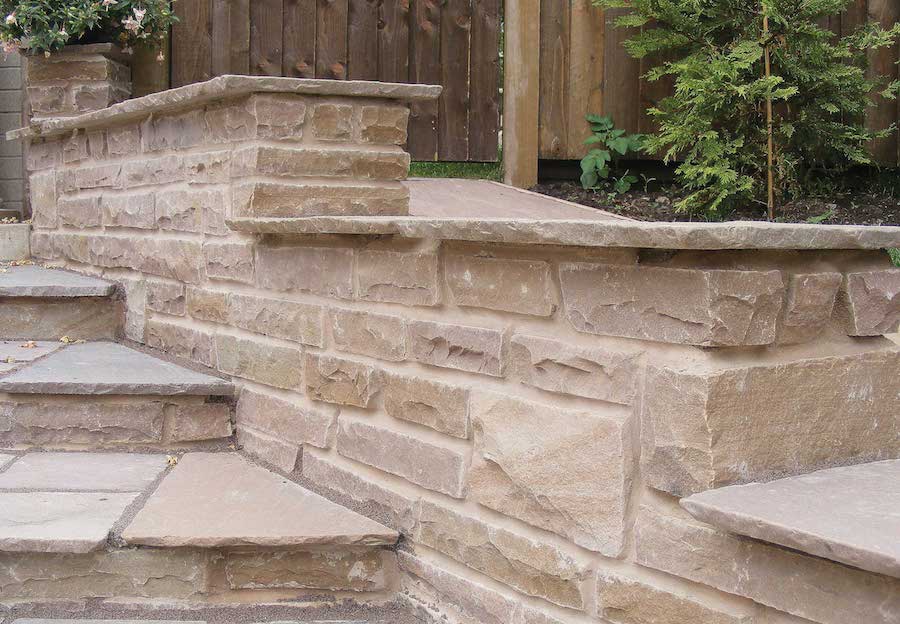
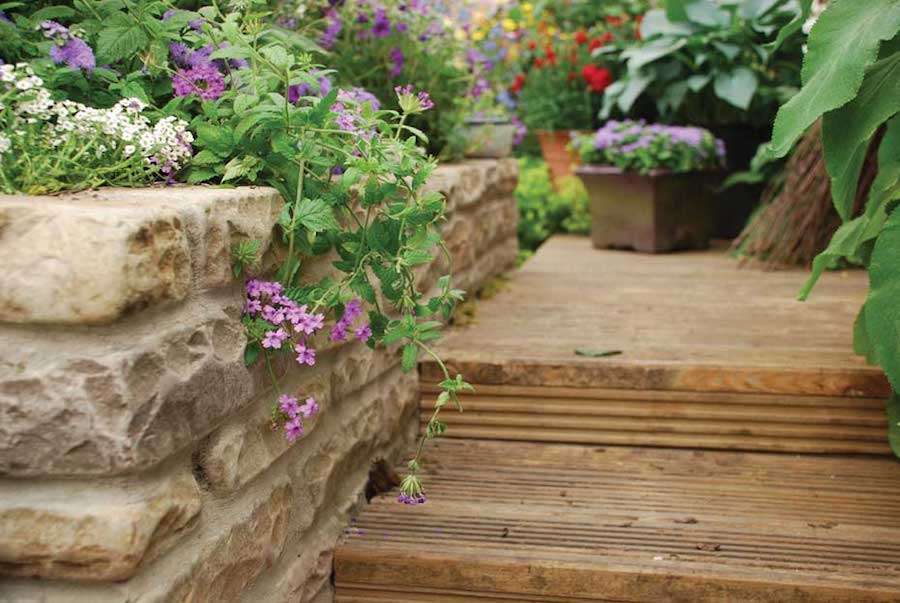
Walling blocks are ideal for creating a raised bed, enclosing a patio area, garden steps or building a bbq. Terracotta bricks can also be used to create paths and border edging. You may also want to consider using Oakstone timber planter sections to create a raised bed.
Building a small garden wall is something most DIY enthusiasts can do. However, for building a retaining wall over 600mm high, seek professional advice. This also applies to any wall taller than 900mm. Read on to discover our 5 handy tips to help guide you through the process.

5 tips to build a garden wall
1. Dig The Foundations
Dig the Trench: Start by digging a trench where the wall will sit. The trench should be 200mm (8 inches) deep and 300mm (12 inches) wide. This depth ensures a solid base for the wall, and the width provides enough space for the blocks to sit securely.
Mark the Wall’s Path: Use wooden pegs to mark the edges of the trench, following the planned path of your wall. Tie string between the pegs to create a clear visual reference. This will help you keep the trench straight and align the wall correctly.
Leveling is Key: Use a spirit level to ensure the tops of the pegs are perfectly level. This step is essential for the even placement of the blocks. If your pegs aren’t level, the entire wall will be uneven, which could cause structural issues down the line.
Keep the blocks in the centre: When you lay the first course (layer) of blocks, position them centrally within the trench. This ensures an even distribution of weight and prevents the wall from leaning. It also helps to leave a little space (around 10mm) between the blocks and the trench edge for drainage.
Check for stability: Once you dig the trench, double-check its stability. If you’re working in soft or loose soil, consider compacting the bottom of the trench using a tamper or plate compactor. This will provide a firmer base for the blocks.
Drainage Considerations: If your wall will be a retaining wall or hold back soil, dig a deeper trench. You can also add a layer of gravel at the bottom. This will help with drainage and prevent water buildup, which could weaken the structure over time.
2. Prepare The Foundations
Infill the Trench with Hardcore
- Start by laying down a 100mm (4 inches) layer of compacted hardcore at the bottom of the trench. Hardcore is a mixture of crushed stone, gravel, and rubble that creates a stable and firm base.
- Why it’s Important: Hardcore provides the necessary strength and stability, especially for heavy structures. It also helps with drainage. This keeps water from collecting under your wall. If water collects, it could weaken the foundation over time.
- Tip: Use a plate compactor or manual tamper to compact the hardcore layer. This helps prevent settling later and ensures the ground is firm and stable.
Mix the Concrete
- Next, you'll need to mix your concrete. A standard concrete mix for garden walls is typically 6 parts ballast (gravel and sand mix) to 1 part cement. This mix provides the right balance of strength and workability for a solid foundation.
How to Mix:
- Dry Mix: First, mix the ballast and cement together in a wheelbarrow or mixing tray. Ensure the mix is uniform before adding water.
- Add Water Slowly: Gradually add water to the dry mix, a little at a time, until the mixture is smooth but not too runny. The concrete should be thick enough to hold its shape but still workable.
- Why It’s Important: The concrete layer helps bond the hardcore and provides the final level of stability. It also helps protect the wall from moisture damage by acting as a solid, durable base.
Pour and Level the Concrete
- Pour the mixed concrete into the trench, covering the compacted hardcore. You’ll want to fill the trench to the level you need for the first course (layer) of blocks.
- Use a Trowel or Board: After pouring, use a spirit level and a straightedge, like a piece of wood, to level the concrete. This will help make the surface even and smooth. This will help your blocks sit flat and align properly.
- Let it Set: Allow the concrete to set and harden for at least 24 hours before continuing. This will give it enough time to achieve sufficient strength to support the wall.
Drainage Considerations
- If your wall will be a retaining wall, or you expect it to retain soil, adding drainage is essential. Water can build up behind the wall, causing pressure and potentially leading to collapse.
How to Add Drainage:
- Weep Holes: Drill small holes (weep holes) in the concrete every couple of feet to allow water to escape.
- Perforated Pipe: Place a perforated drainage pipe behind the trench before pouring the concrete. This helps direct any water behind the wall away from the base, preventing pressure buildup.
Tip: Consider laying a layer of gravel behind the wall once the concrete has set. This will improve drainage and reduce the chances of water collecting behind the wall.

3. Build One Course At A Time
Set a Building Line for Precision
- Stretch a Building Line: Start by stretching a building line (or string) tightly from one end of the foundations to the other. This line will guide you, ensuring that you lay your blocks in a straight, level line.
- Why it’s Important: A straight line keeps your wall on track as you build. This leads to a better look and stronger structure.
Prepare the Mortar Mix
- Mix the Mortar: Prepare the mortar by combining 4 parts building sand to 1 part cement. This mix should be thick enough to hold the blocks in place without being too runny.
- Why it’s Important: The right mix helps the blocks stick well to the foundation. This creates a strong bond that keeps the wall stable. Mortar that is too dry or too wet can cause the blocks to shift or not stick properly.
- Tip: If you mix mortar in small batches, only mix what you can use in 30 minutes. This helps prevent it from drying out before you apply it.
Apply Mortar to the Foundation and Blocks
- Spread the Mortar: Using a trowel, spread an even layer of mortar over the foundation where the first course of blocks will sit. Spread the mortar evenly, but keep it no thicker than about 10mm in depth for the best results.
- Why it’s Important: This provides a stable, sticky surface for the blocks to rest on, helping them stay in place. Too little mortar can lead to gaps, while too much can make the blocks unstable.
- After you spread mortar on the foundation,
- Apply a thin layer of mortar on top of each block.
- Then, place the block down. This helps to bond each block to the one below it and provides additional stability.
- Exude Mortar from Joints: As you lay each block, the mortar should slightly exude (or squeeze out) from between the joints. Aim for about 10mm of mortar between the blocks. Remove any excess mortar with the trowel before it hardens.
- Why it’s important: The mortar that squeezes out shows that the block is seated properly. Removing extra mortar stops it from staining the blocks. This gives the wall a cleaner and more professional look.
Fill the Vertical Joints
- Apply Mortar to the Vertical Joints: When you place the next block, make sure to fill the vertical joints. These are the spaces between the blocks. Apply mortar to the end of the block that will sit next to the previous one.
- Why it’s Important: Filling the vertical joints helps bond each block to the ones next to it. This prevents movement or separation between the blocks.
Check for Level and Alignment
- Use a Spirit Level: After you place each block, use a spirit level. Check the alignment both up and down, and side to side. Make sure each block is level, both from side to side and front to back.
- Check the diagonals of the entire course to ensure everything is squared. An easy way to do this is by measuring from corner to corner. If the measurements are equal, your course is square.
- Why it’s Important: A level and aligned course ensures your wall is straight and sturdy. Without these checks, the wall may shift, or the blocks could become misaligned over time, which could compromise the entire structure.
Remove Excess Mortar
- Clean as You Go: As you work, remove any excess mortar from the faces of the blocks using your trowel. Excess mortar can leave unsightly stains on the blocks, and once it sets, it can be difficult to clean.
Why it’s Important: Keeping the blocks clean makes the wall look better. It also helps keep the finish in good shape. Cleaning as you go is far easier than trying to scrub dried mortar off later.
4. Laid In A Stretcher Bond
When building a garden wall, the way you lay the blocks is just as important as how you prepare the foundation. One of the most common and reliable techniques is laying the blocks in a stretcher bond pattern. This ensures that the wall is both strong and visually appealing.
What is a Stretcher Bond?
- A stretcher bond is a way to lay bricks. In this pattern, the long side of each brick is flat.
- You should stagger the joints between the bricks. This means that no vertical joints line up between the rows. This overlapping pattern gives the wall strength and stability.
- Why it’s Important: This pattern spreads the wall's weight evenly. This helps stop vertical cracks and weaknesses. By offsetting each row, you create a stronger bond between blocks, which makes the wall more durable and less likely to shift.
Lay Full Blocks in Each Course
- Start with Full Blocks: Begin each course (row) with full-sized blocks. Workers will lay these blocks directly on top of the mortar layer, ensuring that the bond is solid.
- Why it’s Important: Full blocks create a strong foundation for each course and help maintain the wall’s overall alignment. If you use only half blocks at the beginning, the wall may become unbalanced or uneven over time.
Use Half Blocks at the End of Each Course
- Cut the Blocks for Half-Block Placement: At the end of each course, you’ll need to use half blocks to maintain the stretcher bond pattern. You should cut these blocks to size so that they fit snugly at the end of the row.
- Why it’s Important: Using half blocks creates a staggered pattern. This means the vertical joints between rows do not line up. This staggered pattern adds both strength and aesthetic appeal, making the wall look more professional and cohesive.
Cutting Blocks to Fit
- Chisels and Hammers: If you're cutting blocks by hand, you can use a chisel and hammer to score and break the blocks. First, mark the cut line with a pencil or chalk, then tap the chisel along the line to create a groove. After scoring the block, use the hammer to break it along the line.
- Angle Grinder: For a smoother, cleaner cut, you can use an angle grinder with a diamond blade. This method is faster and results in a cleaner cut with less risk of damaging the block. Always wear protective gear like goggles and a dust mask when using power tools.
- Why it’s Important: Cutting blocks helps you perfectly finish each row and ensures the stretcher bond pattern remains intact. A clean, precise cut makes sure the blocks fit tightly. This creates a more professional-looking wall. It also avoids gaps that could weaken the structure.
Check Alignment and Level Regularly
- As you lay each course, use a spirit level to check both the horizontal and vertical alignment of the blocks. Since the stretcher bond relies on proper staggering, keeping everything aligned is crucial for both structural integrity and aesthetics.
- Why it’s Important: Even a small misalignment in the stretcher bond can cause the wall to lean or become unstable over time. Checking the level regularly ensures the wall remains straight and level.
Remove Excess Mortar
- Clean as You Go: After you lay each block, remove any extra mortar from the block's surface before it dries. Excess mortar can leave stains on the blocks and make the wall look messy.
Why it’s Important: Cleaning up extra mortar stops stains and keeps the blocks looking clean. This improves the overall look of the wall.
5. Top The Wall With Matching Coping
The elements expose the top of your garden wall, so you must finish it off properly with matching coping. Coping is the top layer that protects the wall from water damage and gives the entire structure a polished look. Here's how to finish the wall effectively:
What is Coping?
- Coping is the material that covers the top of your garden wall. It adds a protective layer. This layer stops rainwater from getting into the wall and causing damage. It also gives the wall a clean, finished appearance.
- Why it’s Important: If not managed well, rainwater can get into the gaps between blocks. This can weaken the mortar and cause erosion over time. Coping prevents water penetration, increases the lifespan of the wall, and improves its aesthetic appeal.
Apply Mortar for Coping
- Prepare the Mortar: If you are adding coping blocks, like stone, brick, or pre-cast concrete, you need fresh mortar. Ensure the mortar is mixed to the same consistency as what you used for the rest of the wall.
- Apply a Layer of Mortar: Spread a thin layer of mortar on top of the wall. Make it wide enough to hold the coping material. This layer should be smooth and even, providing a strong bond between the coping and the wall.
- Why it’s Important: A strong mortar base helps the coping stick to the wall. This keeps it in place over time. It also protects the wall from weather and damage.
Set the Coping in Place
- Place the Coping: Carefully place the coping stones or blocks on top of the mortar, ensuring they fit snugly. You can use a rubber mallet to tap them into place. This will help ensure a tight fit without damaging the coping material.
- Why it’s Important: The coping should fit tightly on the wall to prevent water from getting underneath. Any gaps can lead to moisture infiltration, which can weaken the wall and cause long-term damage.
Smooth and Finish the Mortar Joints
- Use a Pointer Trowel: After placing the coping, use a pointer trowel. This tool helps smooth and finish the mortar joints. Focus on the joints between the coping stones and the blocks below. A pointer trowel has a thin, pointed blade, making it perfect for finishing the joints neatly.
- Why it’s Important: Neatly finishing the joints makes the wall look better. It also helps prevent the mortar from cracking or crumbling. A smooth joint prevents water from seeping into the mortar and adds a professional touch to the final look.
Clean Up Excess Mortar
- Remove Extra Mortar: Before the mortar dries, use a damp sponge or cloth. Wipe away any extra from the blocks and coping. Be sure not to disturb the joints, as cleaning the mortar too soon can pull it out of place.
- Why it’s Important: Removing excess mortar keeps the surface of the coping clean and free from stains. It also helps the blocks and coping retain their natural appearance, making the finished wall look clean and professional.
Allow the Mortar to Set
- After the coping is in place and the joints are smoothed, let the mortar set for at least 24 hours before proceeding. This gives the mortar time to cure and ensures the coping stays firmly in place.
Why it’s important: If you rush this step, the coping may move or shift. This can weaken your wall.
